The intelligence and memory of raccoons are also remarkable. Their average IQ level is just below that of a monkey! This brings raccoons considerably close to “human IQ” levels as well.
Raccoons are adaptive and learn from their experiences. They remember solutions to tasks for at least three years! These wonderful animals are also capable of solving challenges in various innovative ways.
It’s interesting to know that the English name for “raccoon” is derived from the Proto-Algonquian language. It translates as “one who rubs, scrubs and scratches with his hands.” Indeed, paws play an important role in the animals’ lives. They rely heavily upon their heightened sense of touch.
Compared with most mammals, raccoons have four to five times more sensory cells in their paws. This feature allows the animals to “see” an object with their hands without even looking at it. The tactile sensitivity increases when the paws are underwater.
Also, raccoons have vibrissae – specialized hairs that are located above their claws. Vibrissae help to identify objects before actually touching them.
I hope that these bits of information have made you excited to draw one of these wonderful creatures! Let’s continue our creative journey. We’ll learn more interesting facts along the way.
Supplied for Drawing a Raccoon with pen and Ink
I’ll be using three ink liners designated by the numbers 0.05, 01, and 0.3.
A combination of a dip pen and liquid black ink is also a great option for this project. Press harder on your nib when you need a wider line, and lighter for a finer mark.
We’ll also need a graphite pencil and an eraser to create an underdrawing.
My sheet of paper is of a relatively small A4 size. It has a smooth surface.
See also: All About Drawing Papers and Surfaces
Drawing a Raccoon with a Graphite Pencil
With some animals, it’s crucial to have a precise knowledge of anatomy. Otherwise, it can be challenging to create a realistic drawing. However, there are special cases, and raccoons may be considered as such an exception.
Their fur and underfur coatings are very thick. Thus, we can present the body and limbs as a set of masses or general forms. This trick makes our task much easier. In the next steps, we’ll create a simplified framework of a raccoon.
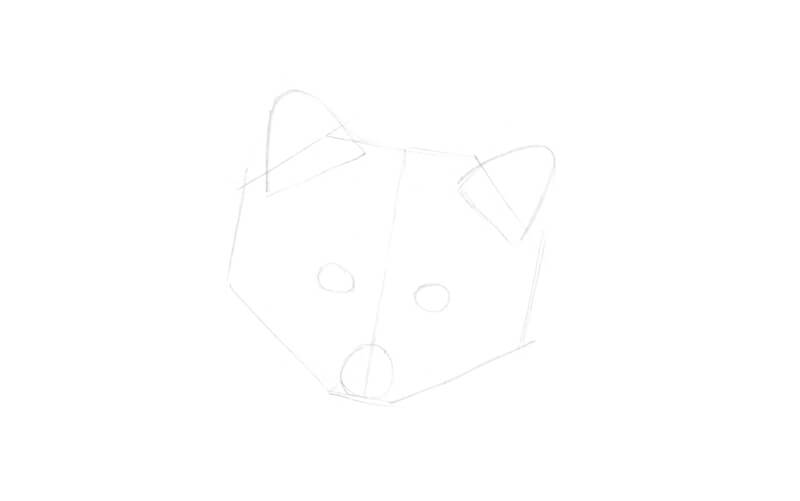
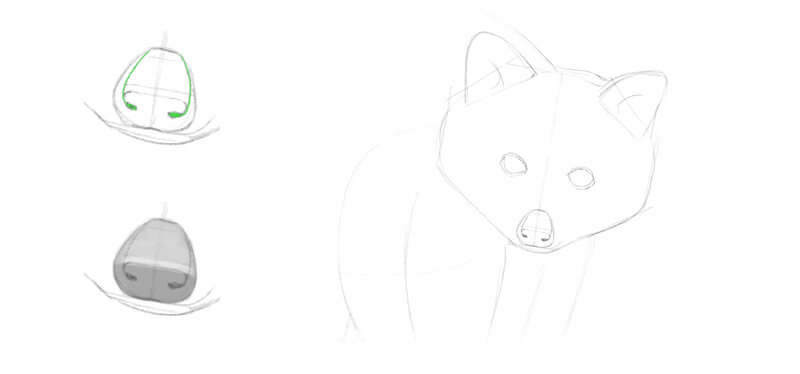
I start with the head, outlining its borders with several sketchy lines. The lower part is narrower than the upper and central sections. The front of the head is facing the viewer, as if the animal is making eye contact.
I add a subsidiary line that divides the main shape into halves. It will help us to check the symmetry. Keep in mind that the equality of the features on both sides is relative and approximate. The foreshortening of the body also affects the features.
I add the general shapes of the eyes, nose, and rounded ears.
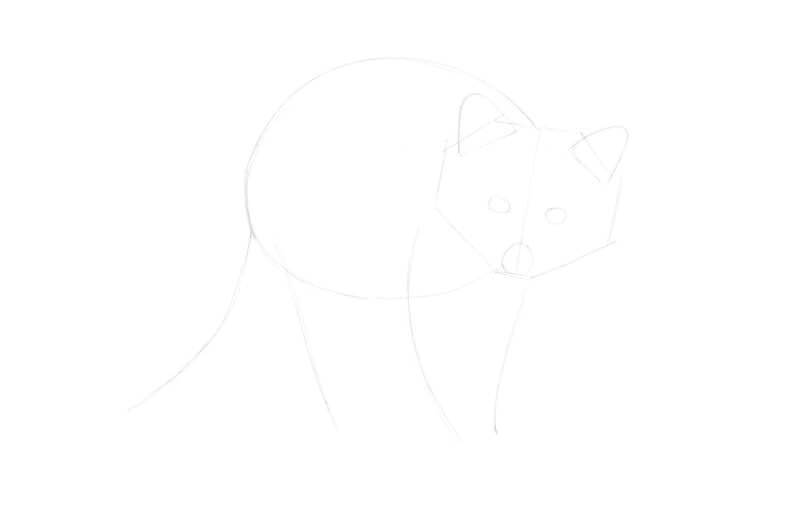
Raccoons have a stocky, compact torso and short limbs. Their hind legs are longer than the front legs, giving the animals a hunched appearance.
Raccoons demonstrate plenty of poses for every artist’s taste. For example, they can stand on the hind legs, examining objects with the front paws.
The body of our raccoon is turned slightly to the side. I mark it with a big rounded shape.
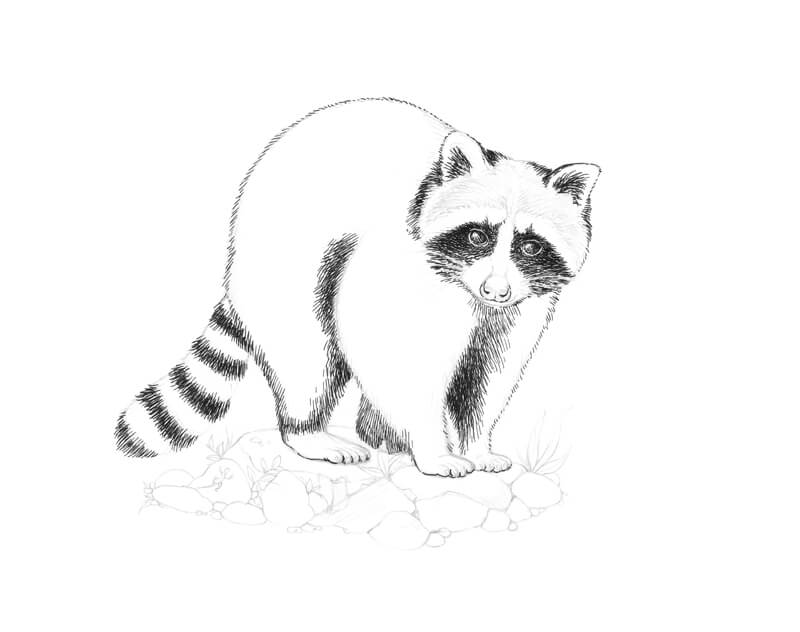
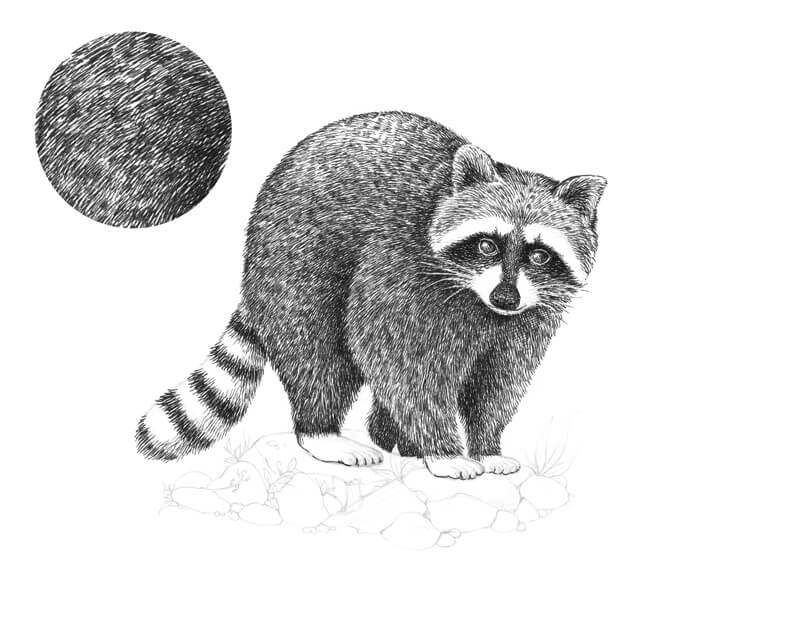
Artworks can not only illustrate ideas or represent real-life objects, but they can also tell stories. I imagine that our raccoon was walking by the viewer and then suddenly stopped. Apparently, something caught the animal’s attention… What could it be?
Then I add the lines that show the direction of the tail and limbs. For now, I mark only the fully visible legs. The remaining one will be added later.
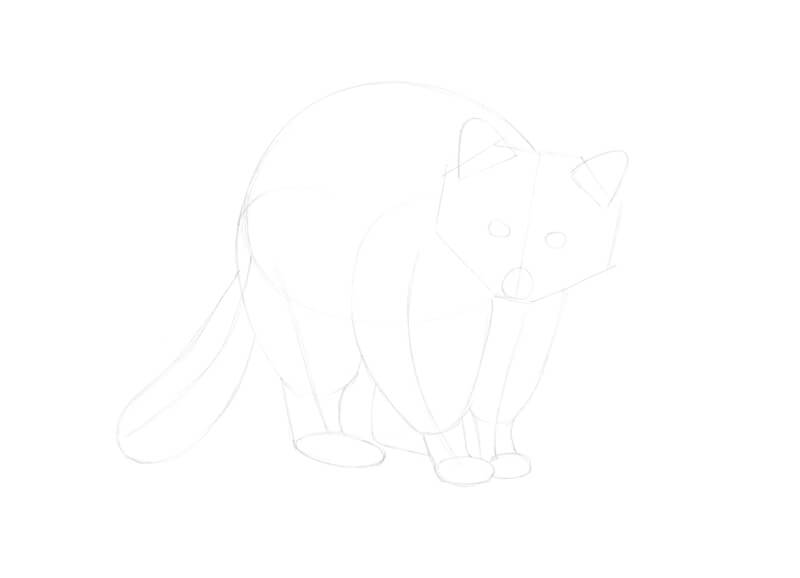
I add the rough shapes of the limbs, including the second hind leg. The smaller rounded shapes indicate the position of the paws. The shapes become narrower in the lower areas of the legs. The fur is shorter and less dense there.
The front paws are drawn close together to accent the charming clumsiness of the pose, as well as the compactness of the animal’s body.
I also add the stylized shape of a bushy tail.
It’s time to refine the head. I mark the eyelids and ear openings.
If we observe the nose in a simplified manner, we’ll see that it has two major planes. The top one has a horizontal direction and the lower one (where the nostrils are) is vertical.
A thin edge is joining the planes. The pattern of values depends on the lighting, but this edge often has a soft highlight.
You’ll find a stylized scheme of the nose in the image below. (See the lower illustration.)
The outer edges of the nostrils go up to the top of the nose, forming a interesting relief. The upper scheme in the image below illustrates the idea – pay attention to the green lines.
I also add the lower jaw and soften the overall contour of the head.
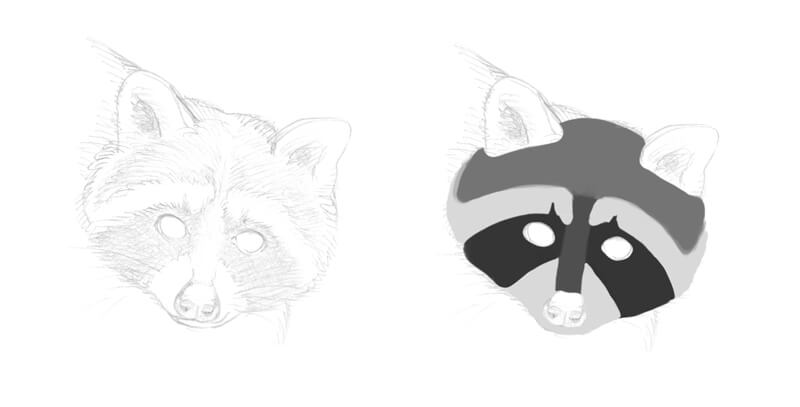
I divide the ‘face’ of our raccoon into sections, depending on the darkness of the fur. In the image below, you’ll find a simplified scheme that presents a four-value scale. Please note that the coloring of actual animals may have some deviations.
First of all, there is a recognizable black mask around the eyes. The nose bridge is quite dark, too, but it is still slightly lighter than the mask.
The upper area of the head may be considered as a midtone. Darker or lighter spots may exist within the section.
The mask is surrounded by contrasting white fur. In my scheme, these areas are marked with a light grey tone. The ears are bordered with white fur, too.
I add groups of whiskers on both sides of the muzzle.
It is reasonable to think that raccoons’ mask coloring serves a useful purpose. It helps to recognize the facial expression and posture of other raccoons. It may also reduce glare, enhancing night vision. Raccoons are awake mostly during the night, so this feature can be quite advantageous.
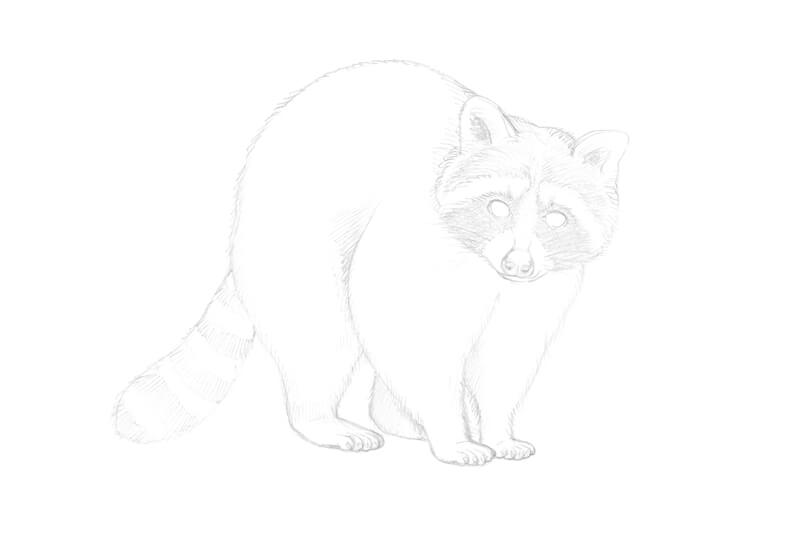
Raccoons have five toes on both the front and hind paws, so I add them. There is no opposable thumb.
The toes are quite long, but this foreshortening reduces the visual length. There are claws at the ends of the toes.
I refine the general contour of the body. To accent the unique feel of the texture, I go over the lines with a series of pencil hatches that imitate hairs.
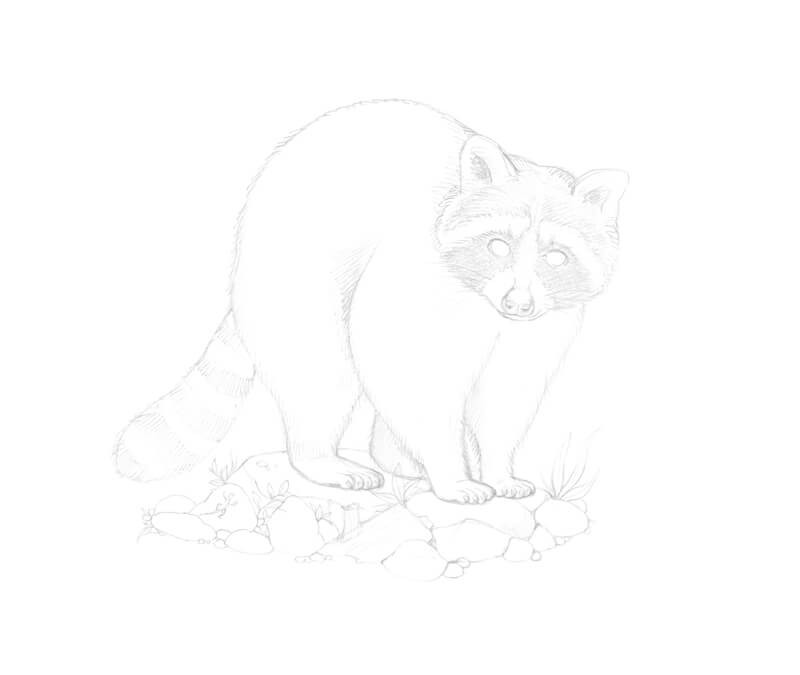
I add some stones, a piece of wood, and plants to complete the underdrawing. The stones differ in size and shape.
A Quick Note on Drawing Fur with Ink
Before we dive into the inking process, let’s take a closer look at the main texture presented in the artwork.
First, we should remember that fur consists of single hairs. They may have different lengths and directions. If we observe this texture in close up, we’ll notice that fur usually has a general direction and rhythm. At the same time, some hairs (or groups of them) may demonstrate a mild deviation from the main flow. Hairs can also overlap each other.
To create a credible illusion of the fur texture, we should convey this flow of hairs and show the overlap. A tonal variation helps to strengthen the effect of depth. It also creates a hint at overlay.
In the image below (a), you’ll find a fur sample. The main direction is diagonal. The hairs go from the upper-left corner to the lower-right one. Some of them are twisting, presenting a variation.
It’s possible to mark out a three-step value scale that forms this sample. The upper hairs or their overlapping fragments are lighter than the hairs beneath. The darkest areas convey the perceived depth and density of the fur.

When we’re drawing an animal in full view, we usually don’t have to focus on single hairs in close-up. It’s quite the opposite. Excessive details of this kind may overload the image with too much visual information.
The best result is achieved when the lines repeat the general flow of fur with minor variations. In the image above (b), you’ll find an illustration of this principle.
Even if there is a high density of ink lines, we still can note tiny gaps of untouched paper. Those gaps give the texture a more natural look. The contrast creates a hint at overlapping hairs and accents the density of the coating.
How to Draw a Raccoon with Ink
You may feel the need to soften the graphite marks with an eraser before applying ink. It’s also possible to remove them at the end of the process. I’m going to leave the pencil marks – they add a pleasant soft undertone.
I cover the eyes with rounded hatches, using the 0.3 liner. The marks repeat the eyes’ contours, accenting the volume of the form. I leave small areas of highlight in the upper parts of each eye.
I draw the dark mask. The lines go from the center of the head to its periphery. I also mark the fur of the ear openings.
I leave the whiskers untouched. If you accidentally draw over the whiskers with ink, don’t worry. It’s possible to recover them later with a white gel pen.
See also: How to Fix Mistakes in a Pen and Ink Drawing
I also mark the darker areas on the raccoon’s body. The lines conform to the fur direction.
I outline the contours of the nose and paws. With long hatches, I create the darker rings of the tail.
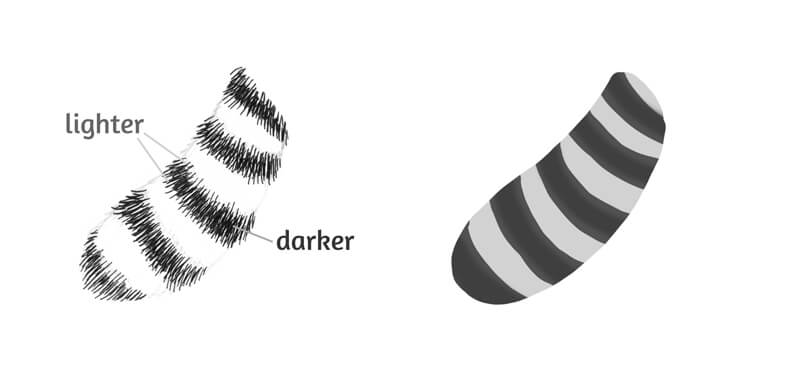
The tail provides a hidden challenge, so here are some additional thoughts.
There are areas of light and dark fur that slightly overlap each other. To a certain extent, they even blend into each other on the rings’ edges. Our goal is to convey this effect, avoiding the sharp cutout look.
I keep the middle parts of the black rings as dark and contrasting as possible. Only tiny white gaps are left. They imitate the subtle gloss that natural hair usually has. The edges of each black ring are lighter than the middle part, but the difference is minor.
In other words, I use more ink lines in the middle of each ring and fewer near the edges.
With 0.1 liner, I continue adding lines that imitate fur. The nose bridge is slightly darker than the upper part of the head. With groups of short hatches, I create variation in the texture.
I add hatching to the nose, making its lower part a bit darker than the rest of it. The difference is subtle because a real raccoon’s nose is very dark.
In our drawing, the nose should be approximately as dark as the mask. I add some dots there to create a hint at skin texture.
With ink lines of medium length, I mark the flow of hairs on the body. The density of hatches may vary, creating an effect of spotty, non-uniform fur. I use the 0.1 liner.
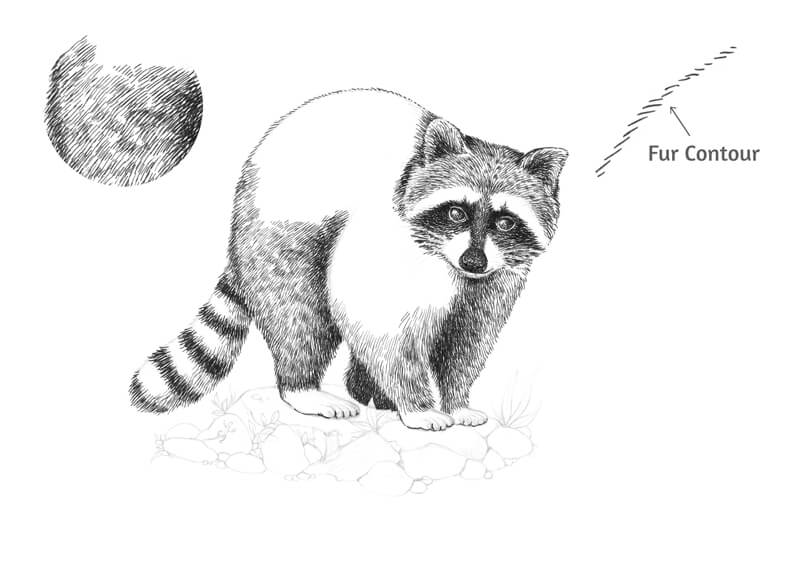
I leave shorter lines near the contours of the body. This trick helps to create an illusion that these areas are farther from the viewer.
The outer contours of the raccoon’s head, body, and limbs are created in this sketchy, fur-imitating manner. I don’t recommend using a single continuous line. With furry animals, such an outline will look unnatural.
I add the ink lines to the darker area of the tail that is near the body.
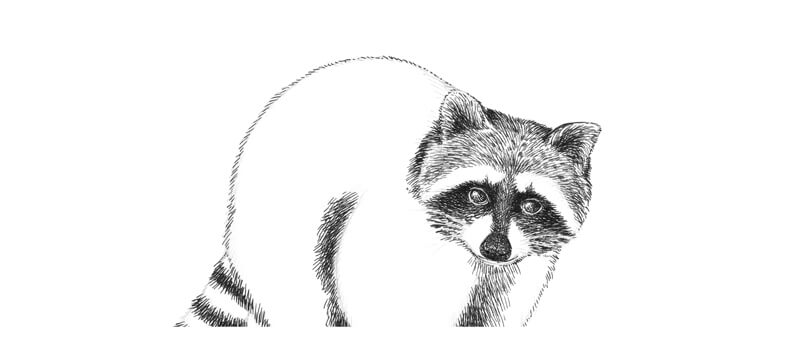
In the image below, you’ll find an enlarged sample of texture from the hip area.
In the same manner, I work on the raccoon’s body. I create tonal variety by making patches of denser ink covering in the fur. The upper part of the body (the back) has a lower density of marks. This difference helps to convey that light that is hitting this area.
Although fur has a noticeable general flow, there is a minor variation within each small area.
When working on the body, I make sure that the whiskers stay uncovered. The fur on the body is relatively dark, so the head contrasts against it.
Let’s work on the paws. They are quite light. However, there is a soft shadowing from the body, and we should keep that in mind.
I use both hatching and stippling to convey the form of the paws. Groups of rounded lines repeat the cross-contours of the limbs’ lower parts. This character of marks helps to create an illusion of volume. I still use 0.1 ink liner.
See also: Cross Contour Lines
And don’t forget to mark the claws!
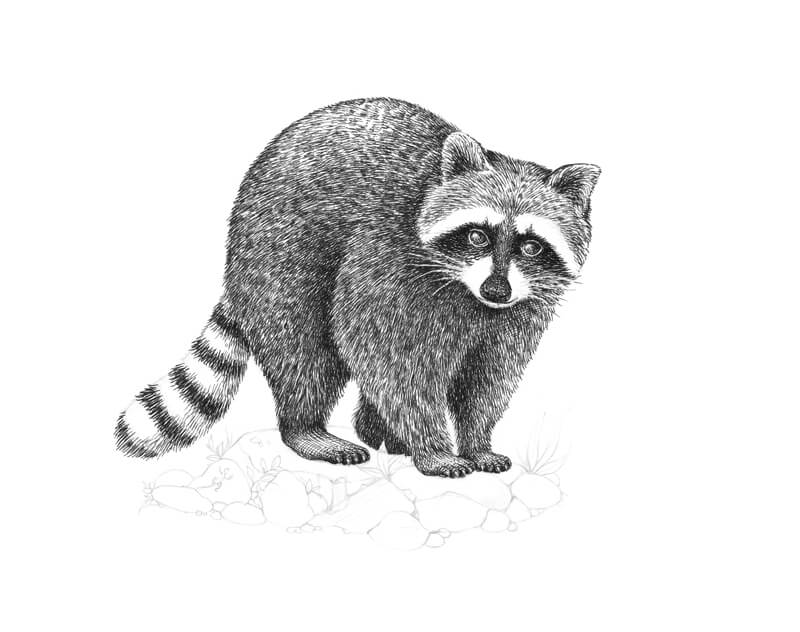
With 0.05 ink liner, I add the lightest fur of the head and tail. The lines follow in the same direction of the hairs. In the areas of white fur, I leave much of the paper untouched. I use very short marks and dots near the nose.
I also darken the mask and the areas right around the eyes. The eyes’ highlights are too big and bright, so I reduce them.
Also, I darken the fur at the sides of the head to give it more volume.
With 0.1 liner, I outline the contours of the stones and other elements in the lower part of the drawing.
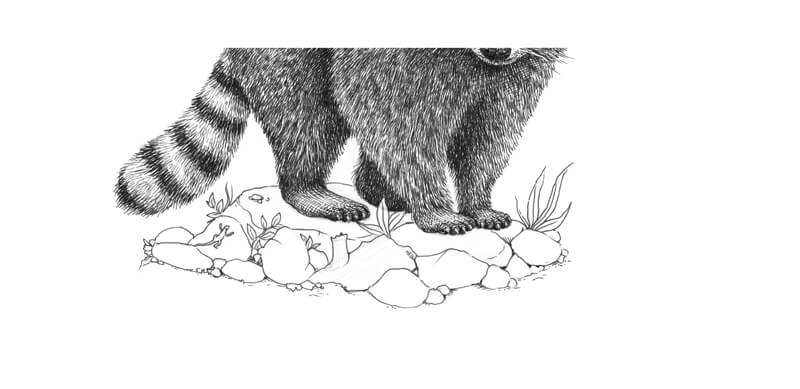

With 0.1 liner, I cover the stones with layers of hatching. Parallel hatching helps to convey the perceived smoothness of the stones’ texture.
The upper areas of stones are lighter than the lower ones, as they receive more light from the environment. However, there is also a cast shadow created by our raccoon. It mutes down the brightness of the stones near the paws.
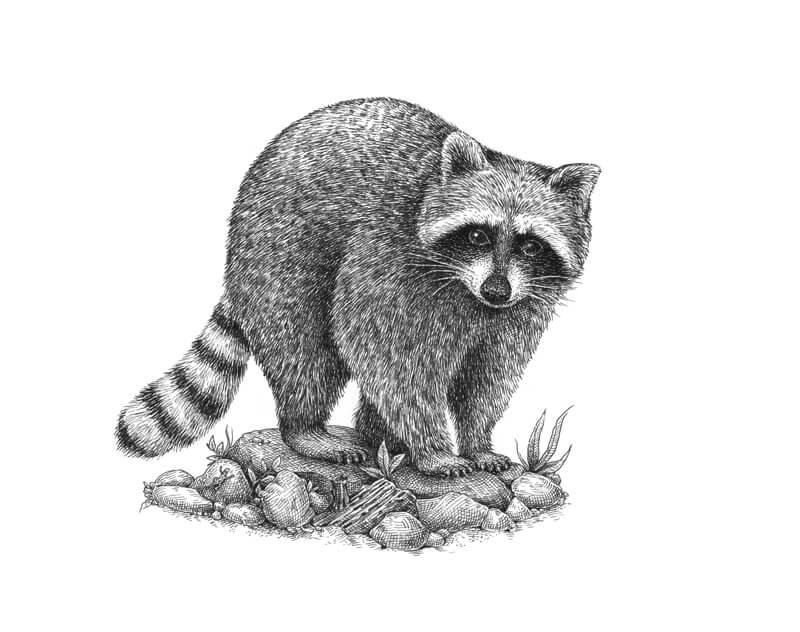
How to Draw a Raccoon with Pen and Ink – Conclusion
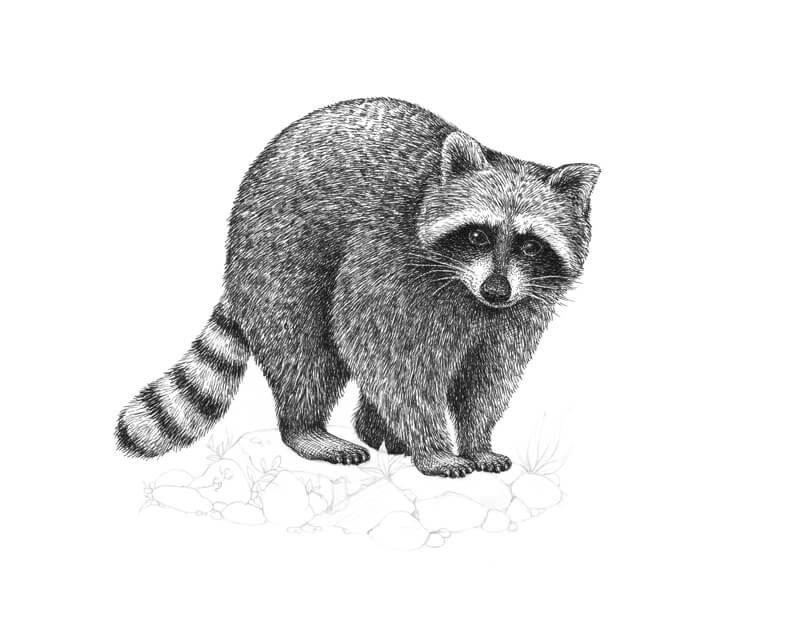
Congratulations – we’ve created a beautiful artwork! I hope that our creative journey was fun and enjoyable. Raccoons, much like other furry animals, are a joy to draw with a linear medium like pen and ink. Just keep your directional stroke making in mind and stay patient.
If so, join over 36,000 others that receive our newsletter with new drawing and painting lessons. Plus, check out three of our course videos and ebooks for free.